Don't miss our holiday offer - up to 50% OFF!
How to customize denim
Denim is one of the most versatile fabrics in the world. From classic blue jeans to jackets, shirts, and overalls, denim has remained a fashion staple for decades. However, as fashion trends evolve, many individuals and brands seek to stand out by customizing denim. Customization transforms ordinary denim into unique, expressive pieces that reflect personal style or brand identity. Whether you are looking to distress, embroider, paint, patch, or reshape your denim, the possibilities are endless. This guide will walk you through every method of denim customization in detail, ensuring you understand both the creative process and the practical execution.
Chapter 1: Why Customize Denim?
Customizing denim allows you to breathe new life into old garments, reduce waste, and create something truly one-of-a-kind. For fashion brands, customized denim can become a signature product that sets them apart in a crowded market. Personalization also adds sentimental value—turning a pair of jeans into a canvas for memories, art, or statements. Moreover, customized denim often commands higher prices due to its uniqueness and craftsmanship.
Chapter 2: Tools and Materials Needed for Denim Customization
Before starting any denim customization project, gather the following tools and materials:
- Denim garments (jeans, jackets, shirts, skirts, etc.)
- Fabric scissors and seam ripper
- Chalk or fabric marker for sketching designs
- Sandpaper or pumice stone for distressing
- Embroidery needles and threads in various colors
- Acrylic fabric paint and fine brushes
- Denim patches (leather, printed, or embroidered)
- Iron-on adhesive web or fabric glue
- Studs, rivets, chains, and buttons
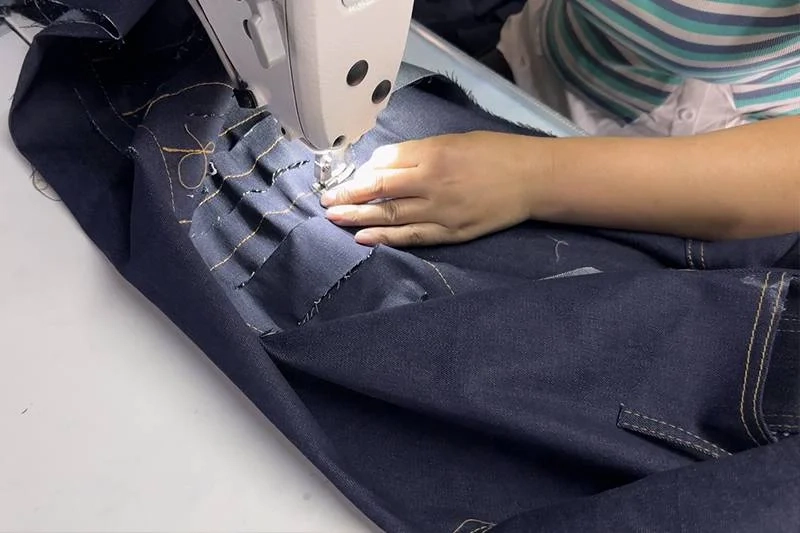
- Sewing machine with heavy-duty needle (optional but recommended)
- Bleach, dye, or spray paint for color alterations
- Protective gloves and apron
Having these items on hand ensures you can execute most customization techniques professionally.
Chapter 3: Distressing and Ripping Denim
One of the most popular customization styles is creating a worn, distressed look. Here is a step-by-step guide:
Step 1: Choose the Area
Decide where you want the distress—knees, thighs, back pockets, or hems.
Step 2: Mark the Lines
Use chalk to draw horizontal lines where you plan to cut or fray.
Step 3: Cut and Fray
Using a sharp blade or scissors, make small slits along the lines. Then use tweezers to pull out the vertical white threads, leaving only the horizontal blue threads. This creates authentic frayed holes.
Step 4: Sanding for Fade
Rub sandpaper or a pumice stone on areas like thighs and seat to create a faded, worn effect. For deeper wear, use a wire brush.
Step 5: Wash and Dry
After distressing, wash the denim to soften the frayed edges and enhance the natural look.
Chapter 4: Embroidery on Denim
Embroidery adds color, texture, and personality. You can embroider flowers, geometric shapes, logos, or abstract patterns.
Step 1: Design Your Pattern
Draw the design on paper, then transfer it to the denim using chalk or a water-soluble marker.
Step 2: Hoop the Fabric
Use an embroidery hoop to keep the denim taut. Denim is thick, so ensure your hoop is sturdy.
Step 3: Choose Stitches
Basic stitches like backstitch, satin stitch, and French knots work well. For bold designs, use a thicker thread or multiple strands.
Step 4: Start Stitching
Work from the center outward. Keep stitches even and consistent. For large areas, consider using a sewing machine with embroidery settings.
Step 5: Secure and Trim
Once finished, tie off threads on the inside and trim excess. Iron the embroidered area gently from the reverse side.
Chapter 5: Painting on Denim
Fabric paint allows for unlimited creativity, from abstract splatters to detailed murals.
Step 1: Prepare the Denim
Wash and dry the denim to remove sizing. Place a piece of cardboard inside the garment to prevent paint bleeding.
Step 2: Sketch Your Design
Use chalk or a white pencil for dark denim. For light denim, use a charcoal pencil.
Step 3: Apply Paint
Use fabric acrylics. Apply thin layers, allowing each to dry before adding another. Use stencils for repeating patterns.
Step 4: Heat Set the Paint
After 24 hours of drying, iron the painted area on the reverse side with a cloth barrier. This fixes the paint for durability.
Step 5: Seal if Necessary
For heavy wear areas, apply a fabric sealant spray.
Chapter 6: Adding Patches and Appliqués
Patches are excellent for covering holes or adding decorative elements.
Step 1: Select Patches
Choose iron-on or sew-on patches. Leather, woven, or printed patches each give different vibes.
Step 2: Position the Patch
Arrange patches on the denim. Try asymmetrical or clustered layouts.
Step 3: Attach the Patch
For iron-on patches, preheat the iron, place a thin cloth over the patch, and press firmly for 30 seconds. For sew-on patches, use a backstitch around the edges.
Step 4: Layer Patches
You can layer smaller patches over larger ones for a collage effect. Mixing textures adds depth.
Chapter 7: Bleaching and Dyeing Denim
Changing the base color of denim is a dramatic customization.
Bleaching Technique
- Mix 1 part bleach with 3 parts water.
- Apply with a spray bottle for a splattered effect or dip sections for ombre.
- Let sit for 10–15 minutes, checking every 5 minutes.
- Rinse thoroughly in cold water, then wash with baking soda to neutralize bleach.
Dyeing Technique
- Use fiber-reactive dyes for 100% cotton denim.
- Pre-wash denim without softener.
- Follow dye instructions for immersion or tie-dye methods.
- Salt and soda ash help set the dye.
- Rinse until water runs clear, then wash separately.
Chapter 8: Hardware Customization – Studs, Rivets, and Chains
Metal additions give denim an edgy, punk, or luxury feel.
Studs and Spikes
Mark stud placement, then push the prongs through the denim. From the inside, fold prongs flat using a screwdriver. Use a thimble to protect your fingers.
Rivets
Use a rivet setter and hammer. Punch a small hole, insert the rivet, and set with force.
Chains and D-rings
Attach chains to belt loops using small carabiners. Sew D-rings into waistbands for functional decoration.
Chapter 9: Reshaping and Tailoring Denim
Customizing isn’t just about decoration—it’s also about fit.
Tapering Legs
Turn jeans inside out, pin along the inner seam from knee to ankle, sew along the pin line, then cut excess fabric.
Cropping Length
Mark desired length plus 1 inch for hemming. Cut straight across, then fold and sew a new hem. Leave raw edges for a frayed look.
Adding Zippers or Lace-up Sides
Cut along the outer seam, insert a zipper, or install grommets and thread ribbon for a corset-style back or sides.
Chapter 10: Advanced Customization – Mixed Media and Upcycling
Combine multiple techniques for high-impact results. For example:
- Bleach splatter + embroidery over the bleached areas
- Patchwork denim – sew together pieces from different jeans
- Paint + studs – create a themed jacket (e.g., floral paint with metal stud outlines)
- Reverse denim – wear inside out and add contrasting stitching
Upcycling old denim into bags, skirts, or vests is also a sustainable customization form.
Chapter 11: Caring for Customized Denim
Customized denim requires special care to preserve the work:
- Wash inside out in cold water.
- Use a gentle cycle or hand wash.
- Air dry away from direct sunlight.
- Iron from the reverse side, avoiding painted or studded areas.
- For heavily embroidered or painted pieces, dry clean only.
Chapter 12: Customizing Denim for Brands and Bulk Orders
When customizing denim for a clothing line, consistency and efficiency matter. Techniques like screen printing, laser distressing, and industrial embroidery machines allow for repeatable designs. For brands looking to offer customized denim without in-house facilities, partnering with an experienced manufacturer is essential.
Conclusion: Your Denim, Your Rules
Denim customization is both an art and a skill. Whether you are refreshing an old pair of jeans or creating a collection for a fashion brand, the techniques described above give you full creative control. From subtle distressing to bold paint and hardware, every stitch, cut, and color transforms denim into a personal statement.
About ZENITH CLOTHING – Your Expert Denim Customization Partner
At ZENITH CLOTHING, we are not just writers of guides—we are professional garment manufacturers with years of experience in producing and customizing high-quality denim. Our factory specializes in turning custom concepts into finished products, whether you need distressed jeans, embroidered jackets, painted pants, or wholesale customized denim for your brand. We work with premium raw denim, offer advanced techniques like laser fading, ozone washing, and 3D embroidery, and ensure every piece meets strict quality standards. As ZENITH CLOTHING, we take pride in helping designers, retailers, and individuals bring their denim visions to life. Partner with us, and let’s create denim that stands out, lasts longer, and tells your unique story. Contact ZENITH CLOTHING today to start your custom denim project.