Don't miss our holiday offer - up to 50% OFF!
How to custom denim jacket
The denim jacket is one of the most enduring pieces of casual fashion. Its durability, versatility, and timeless appeal have made it a favorite across generations. However, the true potential of a denim jacket lies not in its factory-original state but in its capacity for customization. Customizing a denim jacket transforms a standard garment into a personal statement—a canvas for art, memory, and identity. Whether you are looking to revive an old jacket, create a unique gift, or express your creative side, learning how to custom denim jacket is a rewarding process. This guide will take you through every method, tool, and technique needed to achieve professional-quality results. By the end, you will understand not only the artistic side of customization but also the structural integrity required to ensure your work lasts. As a professional clothing manufacturer, we at ZENITH CLOTHING understand the importance of craftsmanship, and these principles guide every custom project we undertake.
Part 1: Choosing the Right Base Jacket
Before any customization begins, selecting the right denim jacket is critical. The base jacket determines how well it will hold paint, patches, embroidery, and distressing.
1.1 Fabric Weight and Quality
Denim jackets typically range from lightweight (8–10 oz) to heavyweight (14–16 oz). Lightweight denim is easier to sew through and better for painting or bleaching. Heavyweight denim provides a sturdier base for studs, chains, and large patches. Always inspect the weave—tight, uniform weaves hold embellishments better than loose, irregular ones.
1.2 Fit and Condition
Choose a jacket that fits comfortably in the shoulders and chest. Oversized jackets offer more surface area for large-scale designs. Avoid jackets with significant stains, frayed seams, or thinning fabric unless you intend to incorporate those flaws into a distressed look.
1.3 Color and Wash
Light-wash and white denim jackets are ideal for dyeing, bleaching, and bright fabric paints. Dark-wash and black jackets work best for metallic paints, embroidery, and light-colored patches. Raw, unwashed denim will shrink after the first wash, so always pre-wash and dry your jacket before customizing.
Part 2: Essential Tools and Materials
Professional customization requires the right tools. Below is a comprehensive list organized by technique.
2.1 For Painting and Drawing
- Textile paint (acrylic-based with fabric medium)
- Fine-tip fabric markers
- Stencils (plastic or cardboard)
- Paintbrushes in various sizes (flat, round, liner)
- Palette and water container
- Masking tape for clean edges
2.2 For Sewing and Embroidery
- Denim needles (size 90/14 or 100/16)
- Heavy-duty polyester thread
- Embroidery floss and hoops
- Sharp scissors and seam ripper
- Thimble and needle threader
2.3 For Patch Application
- Iron-on patches (with adhesive backing)
- Fabric glue (permanent, wash-safe)
- Sew-on patches (embroidered or woven)
- Iron and pressing cloth
2.4 For Distressing and Bleaching
- Pumice stone or sandpaper (medium grit)
- Razor blade or box cutter
- Bleach gel or spray
- Rubber gloves and protective eyewear
- Baking soda for neutralizing bleach
2.5 For Hardware and Embellishments
- Studs and spikes (screw-back or prong)
- Chain segments and D-rings
- Grommet and eyelet setter
- Jewelry pliers
Part 3: Planning Your Design
A successful custom denim jacket begins with a clear plan. Sketching your ideas first prevents costly mistakes.
3.1 Theme and Inspiration
Decide on a visual theme: punk rock, bohemian, minimalist, vintage, or artistic abstract. Look for inspiration in music, nature, street art, or historical fashion. Collect reference images and create a mood board.
3.2 Placement and Balance
Divide the jacket into zones: front left and right chest, back panel, sleeves, collar, and hem. The back panel is the largest canvas, ideal for a central graphic or patch. Smaller details work well on sleeves and front panels. Maintain visual balance—if you add a large back design, keep the front simpler.
3.3 Color Palette
Limit your palette to 3–5 colors for a cohesive look. Consider the original jacket color: white jackets pair well with pastels and neons; black jackets suit metallics and bright primaries; blue denim complements warm earth tones and reds.
3.4 Testing Your Design
Before committing, lay out patches, draw temporary lines with chalk, or use removable stencils. Wear the jacket and check the design in a mirror. Adjust placement as needed.
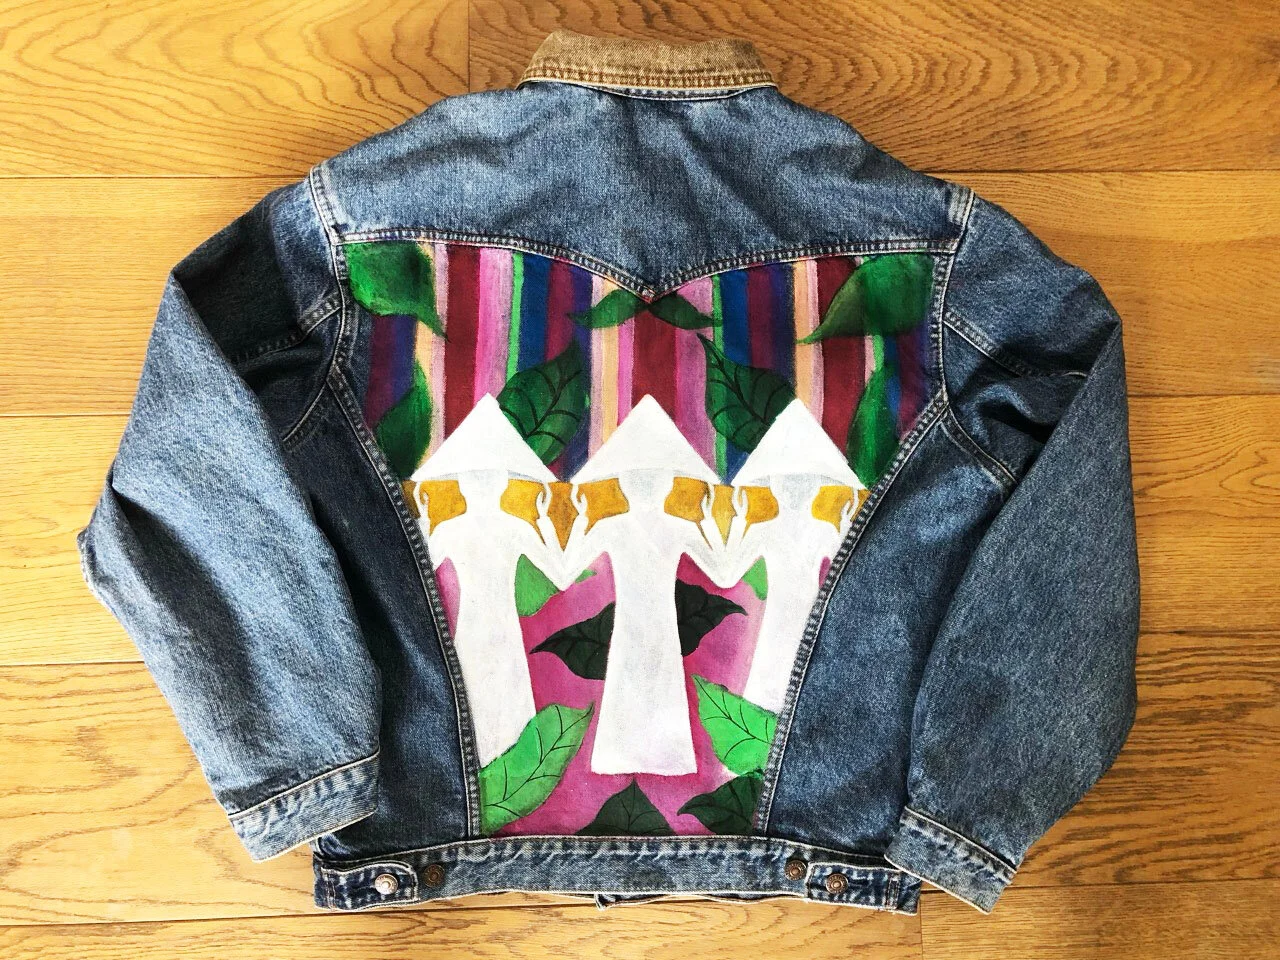
Part 4: Painting on Denim
Painting is one of the most accessible and expressive customization methods.
4.1 Surface Preparation
Wash and dry the jacket to remove sizing. Iron the area to be painted so it is completely flat. Place a piece of cardboard inside the jacket to prevent paint from bleeding to the other side.
4.2 Using Stencils
Secure the stencil with masking tape. Apply paint using a stippling motion (up and down) rather than brushing sideways. Two thin coats are better than one thick coat. Remove the stencil while the paint is still slightly wet to avoid peeling.
4.3 Freehand Painting
Sketch your design lightly with a white charcoal pencil or chalk. Dilute textile paint with fabric medium according to the manufacturer’s instructions. Use liner brushes for outlines and flat brushes for fills. Work from the background to the foreground.
4.4 Drying and Setting
Allow the paint to dry for 24 hours. Heat-set the design by ironing on the reverse side for 3–5 minutes (no steam, medium heat). Do not wash the jacket for at least 72 hours. When you do wash, turn it inside out and use cold water.
Part 5: Adding Patches
Patches are a classic way to add color, texture, and meaning to a denim jacket.
5.1 Iron-On Patches
Place the patch adhesive-side down on the jacket. Cover with a pressing cloth. Apply firm pressure with an iron set to cotton/high heat for 30–45 seconds. Let cool completely before testing adhesion. For curved areas like shoulders, use a seam roll or a rolled towel underneath.
5.2 Sew-On Patches
Thread a denim needle with heavy-duty thread. Use a whipstitch or running stitch around the patch’s edge. For a hidden stitch, sew only through the patch’s border and the jacket’s outer layer, not the lining. Reinforce corners with extra stitches.
5.3 Layering Patches
Create depth by layering smaller patches over larger ones. Use fabric glue to temporarily hold the top patch, then sew permanently. Avoid placing patches over seams or pocket openings unless you are willing to lose function.
5.4 Making Your Own Patches
Cut shapes from other denim garments, canvas, or leather. Apply fabric paint or embroidery to the cut shape. Seal the edges with fray-check liquid. Attach as a sew-on patch.
Part 6: Embroidery and Thread Work
Embroidery adds a handcrafted, textured element that painting cannot achieve.
6.1 Basic Stitches for Denim
The backstitch is ideal for outlines and lettering. The satin stitch fills shapes smoothly. The French knot creates small dots and textured details. The chain stitch works well for curved lines. Practice on scrap denim before working on the jacket.
6.2 Preparing the Denim
Use an embroidery hoop to keep the fabric taut. For thick denim, use a larger hoop and loosen the screw slightly to avoid damaging the fabric. Mark your design with water-erasable pens or heat-erasable pencils.
6.3 Working Through Multiple Layers
When embroidering over pockets or seams, use a thimble to push the needle through. A pair of pliers can help pull the needle out on the other side. Reduce stitch length to navigate tight curves.
6.4 Combining Embroidery with Other Techniques
Paint a background shape, then embroider over it for a mixed-media effect. Add embroidered details around an iron-on patch to make it appear more integrated. Use metallic floss to highlight painted elements.
Part 7: Distressing and Bleaching
For a worn-in, vintage, or grunge look, distressing is highly effective.
7.1 Creating Frayed Holes
Mark the area for the hole with chalk. Insert a piece of wood or thick cardboard inside the jacket. Use a razor blade to make small horizontal cuts. Then use sandpaper or a pumice stone to roughen the cut edges and create fraying. Do not cut across seams or pocket stitch lines.
7.2 Bleaching Techniques
Work in a well-ventilated area with gloves. For a tie-dye effect, twist sections of the jacket and secure with rubber bands. Apply bleach gel or spray. Wait 5–15 minutes, monitoring constantly. Neutralize by soaking the jacket in a solution of 1 part baking soda to 10 parts water. Rinse thoroughly and wash immediately.
7.3 Fraying Sleeves and Hems
Cut the hem stitching and pull horizontal threads to create a fringe. Stop pulling when you reach the desired length. Wash and dry the jacket to accelerate natural fraying. For a cleaner fringe, trim the ends evenly.
7.4 Sanding and Abrasion
Rub sandpaper along high-wear areas: collar points, pocket edges, cuffs, and bottom hem. Focus on edges rather than flat panels. Use fine grit for subtle wear and coarse grit for heavy distressing.
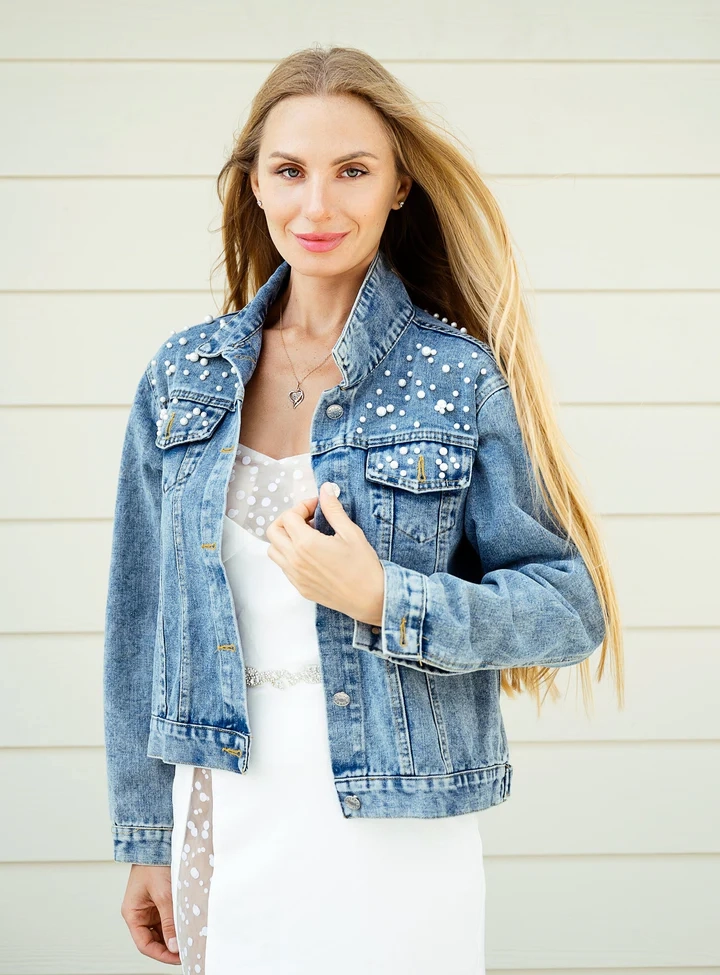
Part 8: Adding Hardware and Embellishments
Metal and plastic hardware give a denim jacket an edgy, industrial feel.
8.1 Installing Studs and Spikes
Mark stud placement with chalk. For prong-backed studs, push the prongs through the denim from the front. On the inside, bend the prongs flat against the fabric using pliers. For screw-back studs, poke a small hole, insert the screw from the inside, and tighten the stud from the outside.
8.2 Attaching Chains
Sew D-rings onto shoulder epaulets or collar points using heavy thread. Clip chain segments onto the D-rings. For a wallet chain look, attach a D-ring near the pocket and another near the bottom hem, then connect with a long chain.
8.3 Setting Grommets and Eyelets
Use a hole punch or awl to create a clean hole. Insert the grommet barrel through the hole from the front. Place the washer over the barrel on the inside. Use a grommet setter and hammer to flare the barrel and secure the grommet. Practice on scrap denim first.
8.4 Zipper and Lace Details
Sew zippers onto sleeve seams or the back panel as decorative elements. Install extra eyelets along the front placket and lace through them with leather cord or ribbon. Replace original buttons with custom metal or resin buttons.
Part 9: Caring for Your Custom Denim Jacket
Customized garments require special care to preserve the artwork and embellishments.
9.1 Washing Guidelines
Turn the jacket inside out. Use cold water and a gentle cycle. Place the jacket in a mesh laundry bag if possible. Use mild detergent, never bleach. For painted or patched jackets, hand washing is safest. Air dry flat or hanging, never use a dryer.
9.2 Spot Cleaning
For small stains, dab with a damp cloth and mild soap. Do not scrub painted or embroidered areas. Blot dry immediately. For studs and grommets, dry thoroughly to prevent rust.
9.3 Storage
Hang the jacket on a wide, padded hanger to maintain shape. Avoid folding heavy embellishments against each other. Store in a cool, dry place away from direct sunlight, which can fade paint and fabric.
9.4 Repairs
Check stitches, studs, and patches regularly. Re-sew loose patches immediately. Tighten loose studs or replace missing ones. Reapply fabric glue to peeling patch edges. Heat-set faded paint with an iron and a pressing cloth.
Part 10: Advanced Techniques for Professional Results
For those ready to go beyond beginner methods, these advanced techniques produce truly unique jackets.
10.1 Bleach Painting
Mix bleach gel with a small amount of cornstarch to create a paintable paste. Apply with fine brushes to draw detailed designs. Neutralize after 10 minutes. This creates a permanent, bleach-discharged design that cannot peel or crack.
10.2 Deconstruction and Reconstruction
Remove sleeves to make a vest. Take panels from a second jacket and sew them into the first for color-blocking. Replace the back panel entirely with a different denim or leather. Use a serger or double-needle machine for durable seams.
10.3 Screen Printing at Home
Create a stencil using vinyl or freezer paper. Iron the stencil onto the jacket. Use a squeegee to pull screen printing ink across the stencil. Lift the stencil while wet. Heat-set with an iron. This method is ideal for repeating logos or large solid shapes.
10.4 Jacquard Weave Integration
Cut small slits in the denim and weave in ribbons, yarns, or leather strips using a tapestry needle. This technique works beautifully on cuffs, collar, and front placket edges. Seal the ends with fray-check.
Conclusion: Your Jacket, Your Story
Customizing a denim jacket is more than a craft project—it is an act of self-expression. Whether you choose to paint a landscape on the back, sew on band patches from your favorite concerts, or distress the sleeves until they feel like second skin, every decision adds a chapter to your jacket’s story. The techniques outlined in this guide are designed to give you the confidence to experiment, make mistakes, and ultimately create something that no factory can replicate.
At ZENITH CLOTHING, we have spent years manufacturing high-quality denim jackets for clients around the world. Our expertise lies not only in producing blank canvases of exceptional durability but also in understanding what makes a custom piece last. We see every jacket as the beginning of a creative journey. Whether you are a DIY enthusiast, a small business owner looking to offer custom products, or a designer preparing a limited-edition run, we are here to support your vision. Our factory produces premium denim jackets in a wide range of fits, washes, and weights—all ready for your personal touch. We invite you to partner with ZENITH CLOTHING for your next custom project. From bulk orders to sample development, our team ensures every jacket meets the highest standards of construction, so your art rests on a foundation that endures. Thank you for trusting us as your manufacturing partner. Now go make something unforgettable.