Don't miss our holiday offer - up to 50% OFF!
how to make a custom denim jacket
The denim jacket is one of the most enduring pieces of casual fashion. Originally designed as a durable work garment in the late 19th century, it has since evolved into a global style icon. However, the true potential of a denim jacket lies not in its off-the-rack form, but in its ability to be customized. Making a custom denim jacket allows you to express individuality, preserve memories, or even create a brand identity. Whether you are a DIY enthusiast or a professional designer, the process involves careful planning, material selection, and precise execution. In this guide, we will walk through every step of creating a unique denim jacket, from choosing the base to applying final touches. And for those looking to produce custom denim jackets at scale, ZENITH CLOTHING stands ready as your expert manufacturing partner.
Chapter 1: Selecting the Right Base Jacket
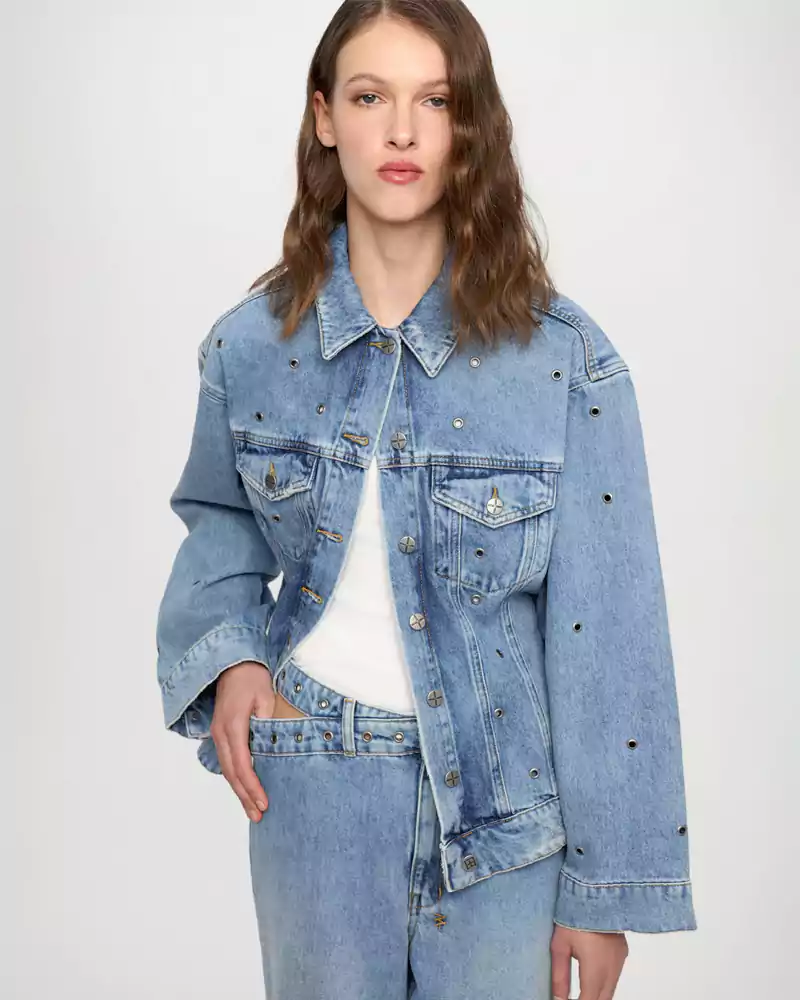
Before any customization begins, you need a high-quality foundation. Denim jackets come in various fits, washes, and weights. The most common style is the trucker jacket, characterized by chest pockets, button-front closure, and side welt pockets. When choosing your base, consider the following factors:
- Fit: Classic, slim, or oversized? The fit determines how your custom elements will be perceived. Oversized jackets offer more canvas space for large patches or paint, while slim fits work well for subtle embroidery.
- Wash: Raw, light, medium, or dark wash? Raw denim ages with wear, creating unique fades over time, while pre-washed denim provides a consistent backdrop.
- Weight: Lightweight (8–10 oz) is easier to sew through by hand, while heavyweight (12–14 oz+) offers durability but requires industrial machinery for modifications.
For beginners, a medium-wash, mid-weight jacket is recommended as it balances contrast and workability. At ZENITH CLOTHING, we produce premium blank denim jackets in over 20 washes and fits, ready for customization or bulk orders.
Chapter 2: Planning Your Design Concept
Customization without a plan often leads to cluttered or unbalanced results. Start by answering these questions:
- What is the theme? (punk, bohemian, minimalist, vintage, branded)
- What techniques will you use? (painting, embroidery, patches, distressing, studding)
- Where will elements be placed? (back panel, sleeves, collar, pockets)
Sketch your design on paper or use digital tools. Consider the jacket’s anatomy: the back yoke offers a large uninterrupted area for murals or logos; sleeves are ideal for vertical text or stripes; chest pockets can hold small embroidered symbols. Balance is key—avoid overcrowding one area while leaving others empty unless intentional.
Chapter 3: Essential Tools and Materials
Depending on your chosen techniques, you will need different supplies. Below is a comprehensive list for common customization methods:
For All Projects:
- Tailor’s chalk or water-erasable marker
- Sharp scissors
- Ruler or measuring tape
- Seam ripper
For Painting:
- Textile or fabric paint (acrylic-based with fabric medium)
- Fine-tip brushes and sponge brushes
- Painter’s tape for sharp lines
- Cardboard insert to prevent bleed-through
For Embroidery:
- Embroidery hoop (for hand stitching)
- Needles (sharp or crewel)
- Cotton or polyester embroidery floss
- Stabilizer backing (tear-away or cut-away)
For Patches & Appliqués:
- Iron-on or sew-on patches
- Fabric glue (temporary or permanent)
- Needle and thread matching patch edges
For Distressing:
- Sandpaper (fine to coarse grit)
- Razor blade or box cutter
- Tweezers (for pulling white weft threads)
- Pumice stone or rotary tool
For Hardware Modifications:
- Studs, spikes, or rivets
- Eyelet setter or stud press
- Hammer and anvil (if using hand-set studs)
Always test paints or distressing on a hidden area first, such as the inside hem. ZENITH CLOTHING offers sample swatches of our denim fabrics upon request, so you can perfect your technique before working on final garments.
Chapter 4: Step-by-Step Customization Techniques
4.1 Hand-Painted Designs
Painting allows infinite color and shape possibilities. Follow these steps:
- Prepare the jacket: Wash and dry it to remove factory starch. Iron flat.
- Insert cardboard: Slide a piece of cardboard inside the jacket between front and back layers to prevent paint seepage.
- Sketch your design: Use tailor’s chalk to lightly draw outlines.
- Mix paint: If using thick fabric paint, thin slightly with water or fabric medium for smoother application.
- Paint in layers: Start with background colors, then mid-tones, then fine details. Allow each layer to dry for 2–4 hours.
- Heat-set: Once fully dry (24 hours), iron on the reverse side or use a clothes dryer on medium heat for 30 minutes to lock the paint.
Pro tip: For gradient effects, blend paints while wet using a dry brush. For sharp lines, use painter’s tape removed while paint is still slightly damp.
4.2 Embroidery and Stitching
Embroidery adds texture and permanence. Hand embroidery is accessible, but machine embroidery is faster for repeated designs.
Hand Embroidery Steps:
- Hoop the fabric area if possible (hard on assembled jackets; use small hoops or work freehand).
- Thread a sharp needle with 2–3 strands of floss.
- Use basic stitches: backstitch for outlines, satin stitch for filling, chain stitch for curves.
- Work from the center outward to avoid distortion.
- Finish by tying knots on the inside and weaving in ends.
Machine Embroidery Tips:
- Use a ballpoint needle to avoid cutting denim fibers.
- Hoop with a stabilizer underneath to prevent puckering.
- Digitize your design carefully—dense stitching may cause needle breakage on thick seams.
For brands or bulk production, ZENITH CLOTHING offers computerized embroidery services with up to 15 needle colors and 360mm x 360mm stitching area.
4.3 Applying Patches and Appliqués
Patches are perfect for covering stains or adding instant character.
Iron-On Method:
- Preheat iron to cotton setting (no steam).
- Position patch adhesive-side down.
- Cover with a thin cotton cloth.
- Press firmly for 30–45 seconds without moving iron.
- Let cool, then check edges. If lifting, sew down corners.
Sew-On Method (more durable):
- Pin patch in place.
- Use a whip stitch or blind stitch around the perimeter.
- For leather patches, punch holes before sewing.
4.4 Distressing and Aging
A worn look can be artificially created with tools.
Creating Frayed Holes:
- Mark hole locations with chalk.
- Use a razor blade to cut a small slit (1–2 cm).
- Pull out blue warp threads with tweezers, leaving white weft intact.
- Rub edges with sandpaper for fuzziness.
Fading and Whiskering:
- Rub sandpaper horizontally across chest and elbow areas.
- For deeper fade, use a pumice stone or rotary sanding drum.
- Wash jacket with two tennis balls to soften and enhance fraying.
Caution: Do not cut across seams or pocket linings, as this weakens structural integrity.
4.5 Adding Studs, Spikes, and Hardware
Metal embellishments give a rebellious edge.
Screw-Back Studs:
- Mark positions with chalk.
- Use an awl to punch a small hole.
- Insert stud prongs through fabric, then press prongs flat on inside.
- Cover prongs with felt or tape to avoid scratching skin.
Rivet Application:
- Punch hole slightly smaller than rivet post.
- Insert post from outside, cap from inside.
- Hammer or press until cap locks.
For button replacement (e.g., changing a standard button to a custom snap), you will need a button press and matching dies.
Chapter 5: Combining Techniques for Unique Effects
Advanced customizers often layer techniques. For example:
- Paint a skull, then embroider its outline, then add stud eyes.
- Distress around a sewn patch to integrate it into the fabric.
- Bleach-stencil a design before overpainting for translucent effects.
One striking combination is “sashiko repair” – using bold white stitching over painted or torn areas, borrowing from Japanese mending traditions. Another is “reverse tie-dye”: apply bleach gel in patterns, neutralize with hydrogen peroxide, then overdye with fabric paint.
Always consider the jacket’s intended use. Heavy distressing and studs are fine for casual wear but may not suit a professional brand uniform.
Chapter 6: Caring for Your Custom Denim Jacket
Customized denim requires special care to preserve your work.
- Washing: Turn inside out, use cold water, gentle cycle. Wash separately or with dark colors.
- Drying: Air dry flat or line dry. High heat can crack paint and shrink denim.
- Ironing: Iron on reverse side. For painted areas, use a pressing cloth and avoid direct contact.
- Storing: Hang on wide wooden or padded hangers to maintain shape. Avoid folding over painted/embroidered areas.
If a patch begins to lift or paint chips, touch up immediately. For valuable custom pieces, dry cleaning is safest.
Chapter 7: From DIY to Mass Production
While making a single custom jacket is rewarding, scaling that design to hundreds or thousands of units requires professional manufacturing. This is where ZENITH CLOTHING excels. We transform your custom concept into a repeatable, high-quality product.
Our process includes:
- Design Consultation: Our team reviews your sketches, references, or sample jacket. We advise on feasibility, cost reduction, and durability.
- Material Sourcing: We stock premium cotton, cotton-poly, and selvedge denim from 6 oz to 14 oz. Custom washes, enzyme treatments, and laser distressing available.
- Sample Development: We produce 1–3 prototype jackets incorporating your chosen custom techniques—embroidery, screen print, patches, hardware, or all combined.
- Bulk Production: With over 50 industrial sewing machines, 8 computerized embroidery heads, and a dedicated finishing department, we handle orders from 100 to 50,000 pieces.
- Quality Control: Each jacket is inspected for stitch integrity, colorfastness, and hardware security.
Why choose ZENITH CLOTHING for custom denim jackets?
- Experience: 15+ years in garment manufacturing, specializing in denim.
- Customization Depth: We offer techniques most factories avoid – hand-finishing, mixed-media (leather + denim), internal laser etching, and 3D puff printing.
- Ethical Production: All our facilities are BSCI and WRAP certified. We use water-saving ozone washes and recycled packaging.
- Transparent Lead Times: Samples in 10–14 days; bulk orders in 30–45 days, depending on complexity.
- Global Shipping: We export worldwide from our central distribution hub.
Whether you need a single prototype or a full product line, ZENITH CLOTHING delivers consistent, wearable art. Our team works directly with fashion startups, established brands, and promotional merchandise companies.
Conclusion: Wear Your Story
A custom denim jacket is more than clothing—it’s a narrative. Every brushstroke, stitch, and scratch tells something about the maker and the wearer. By following the steps in this guide, you can transform a plain jacket into a personal masterpiece. And when you are ready to bring your vision to a larger audience, remember that ZENITH CLOTHING is here to manufacture custom denim jackets with the same care and creativity you put into your first design.
From one-off DIY projects to bulk orders, the journey of making a custom denim jacket begins with a single idea. Start sketching, start stitching, and wear your art with pride. For manufacturing inquiries, design consultations, or wholesale pricing, contact ZENITH CLOTHING today. Your custom denim story is waiting to be sewn.